Hello Readers !
Below is a demo on configuring transactional replication from an On-premise SQL server to an Azure Managed instance. I have included as many screenshots as possible for making the blog detailed enough to be followed when you configure it in your own environment.It was rather easy to configure it with the UI than the scripts in MSDN documentation., which is why we will be using the UI for the Demo. I will also be sharing a separate blog on configuring transactional replication between two managed instance with the existing limitations using the scripts.
Lets get to the setup required.
Networking requirements : Have a Point to Site/Site to Site VPN or Express route configured to connect your on-premise machine to the Azure VNet.
Publisher and Distrubutor : My Local default Instance
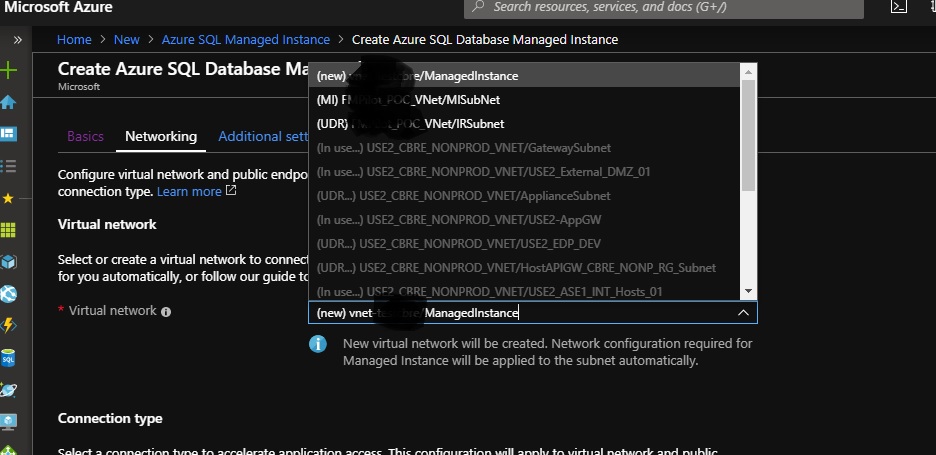
Subscriber : A general purpose Instance I have in our POC VNet.
Snapshot folder :I have created a folder named repl_Snapshot in my local. and gave my machine account full access to it.
Both my SQL server service and agents are set to run with Local system account.
I will be using SQL accounts for authenticating between the replication partners like how it is suggested for MI-MI replication.
I have a DB named DBA created to host the a few tables for maintenance jobs which will be my publication Databases
Articles/Objects for publication : Two tables Named Config and block_locks in DBA database
I also have created a DB named DBA_Sub in the managed instance to which I will be replicating these tables.
I have created a login earlier named AzureAdmin in both the instances and gave it has got sysadmin rights on the instances which would be reused here too.
Steps :
1.Configuring Distributor
Right Clicking on the replication folder in my local instance and launching the 'Configure Distribution ' wizards

Clicking on next and supplying the snapshot folder location.

Clicking next again will take us to the window to enter data and log file locations of distribution database.

Clicking next from here till the last window as there are no input fields.


Finish to complete the distributor configuration,

2. Creating Publication
Right clicking on Local publication folder under the replication folder and launching 'New Publication' Wizards

Clicking next to choose the Publication database which is DBA

Choosing the replication type as Transactional Replication

Selecting the articles/Objects for replication

I am also adding a small row filter on the block_locks table to check if it works too.


Basically i am choosing rows that as got ID values less than 500 , to be replicated from this article.
Pressing OK will gave me a confirmation like the below.

Clicking Next on it takes me to Snapshot agent configuration window.

I am choosing both the checkboxes to initiate the first snapshot and to run snapshot every 1 hour. (Only for testing. I dont recommend to run Snapshot agent every one hour for sensitive environment as it will be unnecessary and can put load on your server)

Next window lets us to supply the accounts underwhich the agents have to run.

I have clicked on Security settings to launch the below window. I am choosing the Snapshot agent to run under SQL agent account and supply the creds to connect to publisher.

Clicking Ok will take us to the previous window like below. I am reusing the security settings for Snapshot agent in the log reader agent by clicking the checkbox below.

We are done with creating publication here


3. Creating Subscription in the managed instance
Right clicking on Replication/Local subscriptions in the managed instance and creating new subscription and in the new window supplying SQL credentials to connect to the publisher ie, my local SQL instance.

Choosing the publication which we created above in the next window

We are going with Push Subscription as thats what works between the MI Instances. I will test the pull one against Local-MI later and post the results here.

Next window will let us choose the subscriber database.


In the next window, I am supplying the credentials to connect to the subscribers and choosing to run the distributor agent under SQL agent account.

I am not setting any schedule for the distributor agent and let it run continuously.

We have choice here to initialize subscription and I am opting for it.


Below gives a summary of whatever settings we have made so far.

Clicking on Finish will finish the 'create subscription' windows.
4. Verifying if the Tables got replicated
The tables are visible in the managed instance already as we set to initialize subscription in windows above.

And the filer on Block_locks worked too

I could also see the agents running without any issues from the replication monitor I have launched from the publisher.

That marks the end of this blog. I will come back with a different topic next time under Azure or SQL server. Keep visiting.
Below is a demo on configuring transactional replication from an On-premise SQL server to an Azure Managed instance. I have included as many screenshots as possible for making the blog detailed enough to be followed when you configure it in your own environment.It was rather easy to configure it with the UI than the scripts in MSDN documentation., which is why we will be using the UI for the Demo. I will also be sharing a separate blog on configuring transactional replication between two managed instance with the existing limitations using the scripts.
Lets get to the setup required.
Networking requirements : Have a Point to Site/Site to Site VPN or Express route configured to connect your on-premise machine to the Azure VNet.
Publisher and Distrubutor : My Local default Instance
Subscriber : A general purpose Instance I have in our POC VNet.
Snapshot folder :I have created a folder named repl_Snapshot in my local. and gave my machine account full access to it.
Both my SQL server service and agents are set to run with Local system account.
I will be using SQL accounts for authenticating between the replication partners like how it is suggested for MI-MI replication.
I have a DB named DBA created to host the a few tables for maintenance jobs which will be my publication Databases
Articles/Objects for publication : Two tables Named Config and block_locks in DBA database
I also have created a DB named DBA_Sub in the managed instance to which I will be replicating these tables.
I have created a login earlier named AzureAdmin in both the instances and gave it has got sysadmin rights on the instances which would be reused here too.
Steps :
1.Configuring Distributor
Right Clicking on the replication folder in my local instance and launching the 'Configure Distribution ' wizards
Clicking on next and supplying the snapshot folder location.
Clicking next again will take us to the window to enter data and log file locations of distribution database.
Clicking next from here till the last window as there are no input fields.
Finish to complete the distributor configuration,
2. Creating Publication
Right clicking on Local publication folder under the replication folder and launching 'New Publication' Wizards
Clicking next to choose the Publication database which is DBA
Choosing the replication type as Transactional Replication
Selecting the articles/Objects for replication
I am also adding a small row filter on the block_locks table to check if it works too.
Basically i am choosing rows that as got ID values less than 500 , to be replicated from this article.
Pressing OK will gave me a confirmation like the below.
Clicking Next on it takes me to Snapshot agent configuration window.
I am choosing both the checkboxes to initiate the first snapshot and to run snapshot every 1 hour. (Only for testing. I dont recommend to run Snapshot agent every one hour for sensitive environment as it will be unnecessary and can put load on your server)
Next window lets us to supply the accounts underwhich the agents have to run.
I have clicked on Security settings to launch the below window. I am choosing the Snapshot agent to run under SQL agent account and supply the creds to connect to publisher.
Clicking Ok will take us to the previous window like below. I am reusing the security settings for Snapshot agent in the log reader agent by clicking the checkbox below.
We are done with creating publication here
3. Creating Subscription in the managed instance
Right clicking on Replication/Local subscriptions in the managed instance and creating new subscription and in the new window supplying SQL credentials to connect to the publisher ie, my local SQL instance.
Choosing the publication which we created above in the next window
We are going with Push Subscription as thats what works between the MI Instances. I will test the pull one against Local-MI later and post the results here.
Next window will let us choose the subscriber database.


In the next window, I am supplying the credentials to connect to the subscribers and choosing to run the distributor agent under SQL agent account.

I am not setting any schedule for the distributor agent and let it run continuously.

We have choice here to initialize subscription and I am opting for it.

Below gives a summary of whatever settings we have made so far.

Clicking on Finish will finish the 'create subscription' windows.
4. Verifying if the Tables got replicated
The tables are visible in the managed instance already as we set to initialize subscription in windows above.
And the filer on Block_locks worked too
I could also see the agents running without any issues from the replication monitor I have launched from the publisher.

That marks the end of this blog. I will come back with a different topic next time under Azure or SQL server. Keep visiting.